


⚡ TL;DR: This guide helps San Bernardino homeowners navigate ceiling water damage repair by explaining essential containment steps, professional restoration choices, and the insurance process to ensure long term home safety.
📋 What You’ll Learn
Facing ceiling water damage in San Bernardino requires prompt action. In this guide, you will learn the essential steps to mitigate structural issues and restore your home to its original condition.
- Stop the damage immediately by utilizing proven containment strategies that protect your living spaces and personal belongings from further water saturation before our professional restoration team arrives onsite.
- Locate the hidden source of the leak by following our expert techniques for inspecting attic spaces and roof structures common to residential properties throughout the San Bernardino area.
- Identify potential mold risks and structural weaknesses that often develop in our unique desert climate, ensuring that you address invisible threats before they compromise your home safety.
- Navigate complex insurance claims by documenting your damages properly, allowing you to secure the coverage you deserve while working through the repair process with your chosen restoration provider.
📖 Reading time: 7 min
✍️ Author expertise: San Bernardino restoration specialist with decades of hands-on experience repairing local water damage.
You wake up to the sound of a rhythmic drip, only to find a sickening, yellow-stained bulge expanding across your ceiling like a spreading bruise. It is the kind of household nightmare that ruins your weekend, spikes your blood pressure, and threatens the structural integrity of your home.
Most homeowners in San Bernardino make the mistake of ignoring that wet spot until it becomes a full-blown cave-in or a mold factory. That passive approach is exactly how a simple leak turns into a multi-thousand dollar disaster that insurance companies love to fight you on.
You do not have to watch your ceiling collapse while you guess what to do next. Here is the exact roadmap to stopping the rot and getting your home back to solid ground.

Immediate Containment: Protecting Your San Bernardino Property Before Help Arrives
The moment you spot that drip, your priority is to stop the water from spreading. If you wait, you are literally paying for more drywall, more insulation, and eventually, more mold remediation.
Grab a bucket and place it directly under the leak. If the ceiling is bulging, take a sharp tool like a screwdriver and gently poke a small hole in the center of the lowest point of the sag; this drains the trapped water and prevents a sudden, heavy collapse that could destroy your furniture or flooring.
Speed matters here. While you wait for professional help, take these fast action steps to stabilize your home:
- Clear out any expensive electronics, rugs, or furniture from the room immediately.
- Locate your main water shut off valve and turn it off if you suspect a plumbing leak.
- Use a tarp or plastic sheeting to cover items you cannot move.
- Capture photos of the initial damage; your insurance adjuster will need these to prove the severity of the loss.
Do not attempt to patch the hole with duct tape or heavy-duty plastic from the top side of the ceiling. You are only trapping moisture inside the wall cavity, which creates the perfect breeding ground for toxic mold in our local climate.
Instead, keep the area ventilated. Set up a fan to blow air directly at the damp patch to keep the surface as dry as possible while you call for emergency water damage support. Remember, a dry environment is your best defense against expensive structural decay.
Pinpointing the Source: How to Track Ceiling Leaks Through Attic and Roof Spaces
Finding the culprit behind a ceiling stain is often like playing a high-stakes game of hide and seek. Water is tricky; it rarely drops straight down from the point of entry. It follows the path of least resistance along rafters, electrical wiring, or plumbing pipes before it finally decides to saturate your drywall.
To track the moisture back to the source, you need to head into the attic with a high-powered flashlight. Do not walk on the ceiling joists unless you want to put your foot through the drywall. Instead, stick to the load-bearing beams and look for the following clues:
- Discolored wood or rusted nail heads on the underside of your roof deck.
- Damp insulation that feels heavy or smells musty.
- Water trails leading from a specific roof vent, chimney flashing, or plumbing stack.
- Light peering through gaps in the roof boards where the seal has failed.
Once you are in the attic, look for the moisture trail leading upward toward the roof peak. If the attic floor is bone dry but the underside of the roof is wet, your issue is likely an external breach like a cracked shingle or damaged flashing. However, if the water is dripping directly off a PVC pipe, you are dealing with a plumbing leak that requires an immediate shutdown of your home water supply.
Never assume the first wet spot you see is the actual break. If you see water staining near a light fixture or AC vent, be extremely careful. Electricity and standing water are a fatal combination, so if you suspect the leak has compromised your wiring, flip the breaker off and call a professional immediately.

Professional Restoration vs. DIY: A Service Options Comparison Table
When you spot that ceiling stain, the urge to grab a bucket and a patch kit is strong. However, San Bernardino homes often hide complex plumbing or roofing failures that simple home remedies cannot fix. Understanding the trade-off between a weekend DIY job and a certified expert intervention is the difference between a permanent fix and a recurring mold problem.
| Feature | DIY Repair | Professional Restoration |
|---|---|---|
| Cost | Low initial expense | Higher upfront investment |
| Speed | Slow, trial and error | Rapid, systematic drying |
| Safety | Risky for mold exposure | Certified, protected gear |
| Insurance | Hard to document claims | Full documentation provided |
| Longevity | Prone to recurrence | Structural integrity guaranteed |
If you choose to handle this alone, you are betting that the water damage is strictly surface level. You must be prepared to handle hidden moisture that tracks along joists and settles into insulation. If you miss even a small pocket of water, mold spores will find a home in the dark, humid corners of your attic within days.
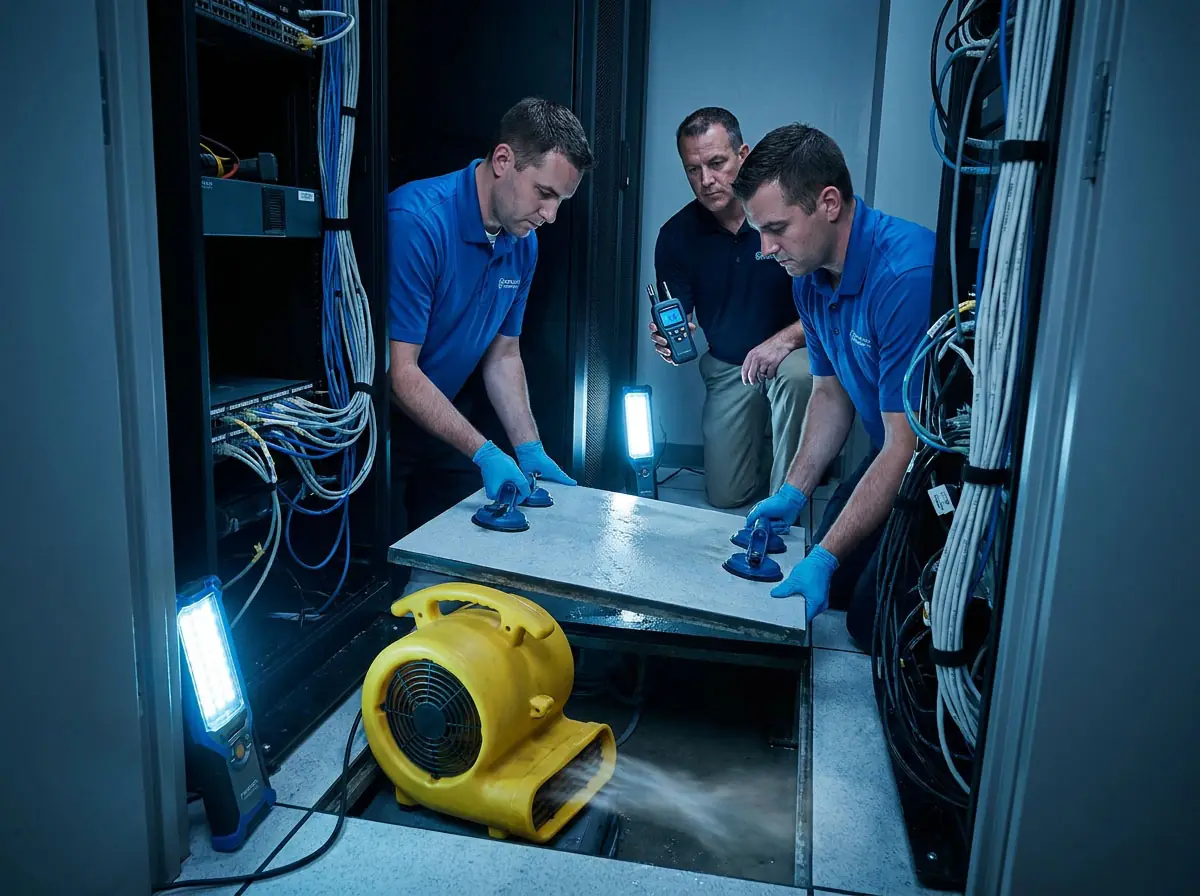
Professional restoration teams bring specialized equipment that a hardware store cannot supply. We use industrial grade air movers and moisture sensors to track exactly where water has migrated. Consider these critical factors before picking up a hammer:
- Does the water involve sewage or grey water from a supply line?
- Are you equipped to test for hazardous lead or asbestos in older ceiling materials?
- Do you have the tools to verify that the studs are dry enough to prevent dry rot?
Saving a few bucks today often leads to a massive bill when the ceiling starts sagging again next month. Professional services provide a paper trail that holds up in insurance audits, protecting your financial interests alongside your family home.
Hidden Hazards: Assessing Mold Risks and Structural Weakness in Desert Climates
Living in San Bernardino means your home is constantly fighting a battle against extreme heat. When water enters your ceiling, it creates a micro-climate trapped behind your drywall that acts like an incubator for trouble.
Mold spores are everywhere, but they only bloom when moisture meets food sources like paper-backed insulation or wooden joists. In our hot, dry climate, you might think the moisture will just evaporate, but that is a dangerous trap; the humidity gets locked in, leading to silent growth that weakens your rafters before you ever see a single spot on the surface.
The Silent Dangers Lurking Above
If you suspect water damage, you must look for more than just surface staining. Structural compromise happens when wet wood loses its load-bearing strength or when drywall joints soften to the point of failure.
- Microbial growth: Mold can colonize unseen areas in as little as 24 to 48 hours.
- Attic humidity: Trapped moisture in the crawl space causes wood rot that is difficult to detect until the ceiling begins to sag.
- Material saturation: Wet insulation loses its thermal resistance, which forces your HVAC system to work overtime to fight the local heat.
Ignoring these signs is a direct invitation for long-term compromise of your home. You need to inspect the attic for sagging boards, pungent odors, or dark fuzzy patches immediately. Do not wait for the ceiling to bow, because at that stage, you are dealing with a major safety hazard rather than a simple repair.

From Sagging Drywall to Seamless Restoration: A San Bernardino Residential Case Study
Last month, we visited a home in the foothills of San Bernardino where a minor roof flashing failure transformed into a living room disaster. The homeowner noticed a small, damp ring, but by the time we arrived, the drywall had lost its structural integrity and was bowing under the weight of trapped water. Water damage moves fast; what looked like a cosmetic issue had already saturated the insulation and reached the wooden joists above the ceiling.
To restore this ceiling, our team followed a strict professional protocol to ensure no moisture remained to trigger future rot. We didn't just patch the surface; we went deep to guarantee the home remained sound.
- Removed two feet of surrounding drywall to expose the affected cavity.
- Applied specialized industrial-grade dehumidifiers to pull moisture from the wooden beams.
- Treated the exposed area with an antimicrobial agent to prevent mold spores from colonizing the damp wood.
- Installed new, moisture-resistant drywall, finished the seams to match the existing texture, and applied a primer that locks out future stains.
The result was a ceiling that looked as if the leak never happened. Ignoring a sagging spot invites disaster because wet drywall acts like a sponge, holding onto contamination long after the dripping stops. Speed is your biggest asset when dealing with structural collapse, as it stops the progression from a simple repair to a complete room rebuild.
Navigating Insurance Claims and Documentation for Water Damage Repairs
Filing a claim for ceiling leaks is where many homeowners lose money because they fail to document the reality of the damage. Insurance adjusters are not on your side; they are paid to minimize payouts, and they will look for any excuse to label your leak as long-term maintenance neglect rather than an emergency event.
You must shift from being a panicked homeowner to a meticulous record keeper the moment you spot that stain. Your goal is to provide an undeniable paper trail that proves the damage was sudden, accidental, and worthy of full coverage.
Essential Steps to Secure Your Claim
- Take high-resolution photos of the ceiling damage from multiple angles before you move anything.
- Record a video walk-through of the leak, showing exactly where water is dripping and any items it has touched.
- Keep a log of every phone call made to your insurer, noting the representative's name, the time, and the specific advice given.
- Save all receipts for emergency repairs, such as tarps or fans, as these are often reimbursable expenses.
Do not let the adjuster see a messy home or evidence that you ignored a slow leak for months. If you have older photos of the ceiling showing it was in good condition, pull them out to prove the problem is recent. Transparency combined with hard evidence is your strongest weapon against claim denials or unfair settlements.
Maintaining Your Home’s Structural Integrity After a Leak
Fixing the immediate mess is only half the battle. If you want to prevent a repeat performance, you must treat your home like a machine that requires proactive maintenance rather than a static object.
Most leaks in our area occur because small vulnerabilities go unnoticed for years. Once you finish your Ceiling Water Damage Repair, you need to tighten the ship to ensure the problem stays buried in the past.
The San Bernardino Maintenance Checklist
Regular inspections are your best insurance policy against future headaches. Set a recurring reminder to walk your property, focusing on these critical areas:
- Inspect roof flashing and vents for cracked seals or loose shingles after our rare but intense rainstorms.
- Clear your gutters of debris to prevent water from backing up and overflowing into your eaves.
- Check your attic during the dry months for signs of water stains, light leaking through roof boards, or pests that may have compromised your insulation.
- Monitor your ceiling paint for bubbling or discoloration; these are the first warning signs of a hidden slow leak that is just getting started.
Keep a close eye on your HVAC system as well. High humidity levels inside your ductwork can lead to condensation buildup that eventually drips onto your ceiling drywall.
Replace your air filters every three months to keep airflow clean and moisture under control. If you catch a drip before it expands, you save yourself a fortune in restoration costs and avoid the health risks of trapped moisture.
People Also Ask
How much does ceiling water damage repair cost in San Bernardino?
The cost depends on the size of the area and whether mold remediation is required. Most homeowners spend between $500 and $3,000, though major structural repairs or significant water intrusion can increase this investment.Is ceiling water damage covered by homeowners insurance in California?
Coverage typically depends on whether the damage was caused by a sudden, accidental pipe burst or long-term neglect. You can review insurance guidelines to understand your specific policy limitations regarding sudden water events.Can I fix ceiling water damage myself?
You can handle minor cosmetic repairs if the leak is small and the area has dried completely. However, if you see sagging drywall or potential mold growth, you should hire professionals to prevent further structural damage or health hazards.How do I know if my ceiling leak is caused by a roof problem?
Look for water trails or moisture in your attic space directly above the ceiling stain. If the leak worsens during rainstorms common in the San Bernardino area, it is highly likely that your roof flashing or shingles are compromised.How quickly does mold grow after ceiling water damage?
Mold can begin to colonize within 24 to 48 hours in damp, dark environments like attic spaces or behind drywall. Rapid drying and professional dehumidification are essential to stop fungal growth before it spreads to other rooms.Need Water Damage Restoration Services?
We provide rapid water damage restoration across San Bernardino and surrounding communities to return your property to a dry, stable condition. Our team arrives quickly to extract water and mitigate structural damage throughout the region (92401, 92404, 92405, 92407, 92408).
Request Price Estimate